2. Epilog Software#
This is page 2 of 3 in the series on how to use the Epilog lasers in the SHED makerspace.
This training goes over Epilog Dashboard, the software we use to run the laser cutters in the SHED. Before continuing, your file should be cleaned and ready to cut.
This software is installed on shared computers in the General Makerspace, next to each laser cutter. You will have to use your RIT ID to unlock the computer to access the software.
Warning
The computers that run the laser cutters are shared computers that are regularly wiped. Do not store files on these computers! If you log into an account, make sure to log out when done so others cannot access it.
Sending Files to Epilog Dashboard#
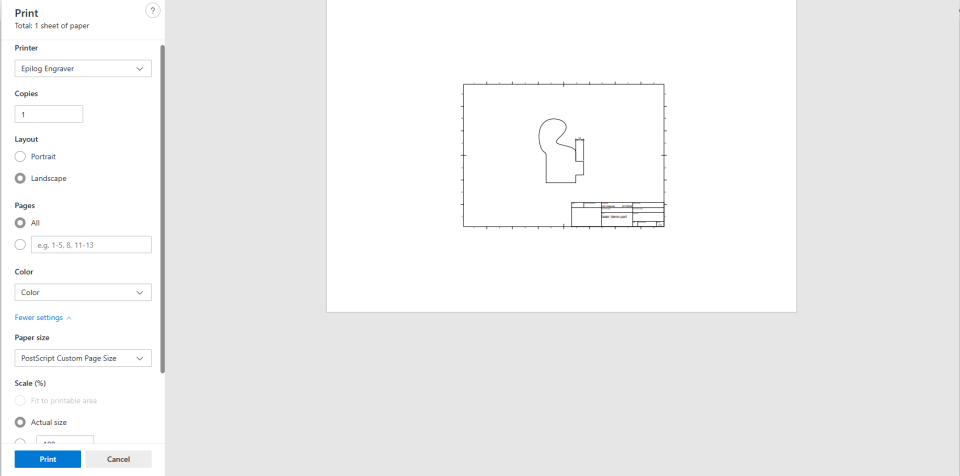
We can't just open our file in Epilog Dashboard, instead we have to print it to the Dashboard. Open your file in one of the following softwares, and hit CTRL+P to open the print dialogs.
-
Microsoft Edge: Best for all file types
-
Windows Photo Viewer: OK for raster images
Inkscape, Chrome, FireFox, etc. will not work.
In the print dialog, make sure that the settings are exactly as follows;
-
Printer: Epilog Engraver
-
Layout: Landscape
-
Paper Size: PostScript Custom Page Size (may be labeled Engraver on some computers)
-
Scale: Actual Size
Positioning Your Cut#
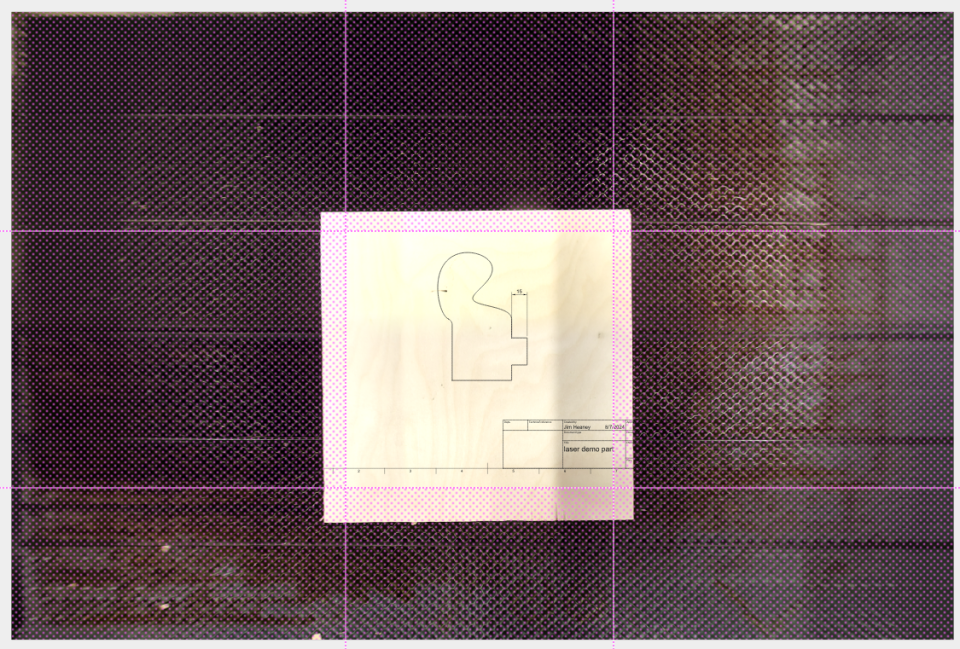 One of the benefits of the Epilog machines is that they have a camera to help align your cut to the material.
You can position your file by clicking and dragging it. If you want to only cut some sections of the file, you can do so by dragging over the pink borders from the corners. Anything inside the pink zone will be ignored.
You can also delete or move independent parts of your file by ungrouping it. To do this, right-click and “Ungroup” to split the file.
Warning
The camera is only accurate to about 6mm or 1/4 inch, and only when the material has been properly focused. Do not rely on the camera for very precise alignment. We'll cover how to check alignment perfectly in the next section of the guide.
Left Menu: Modifying Your File#
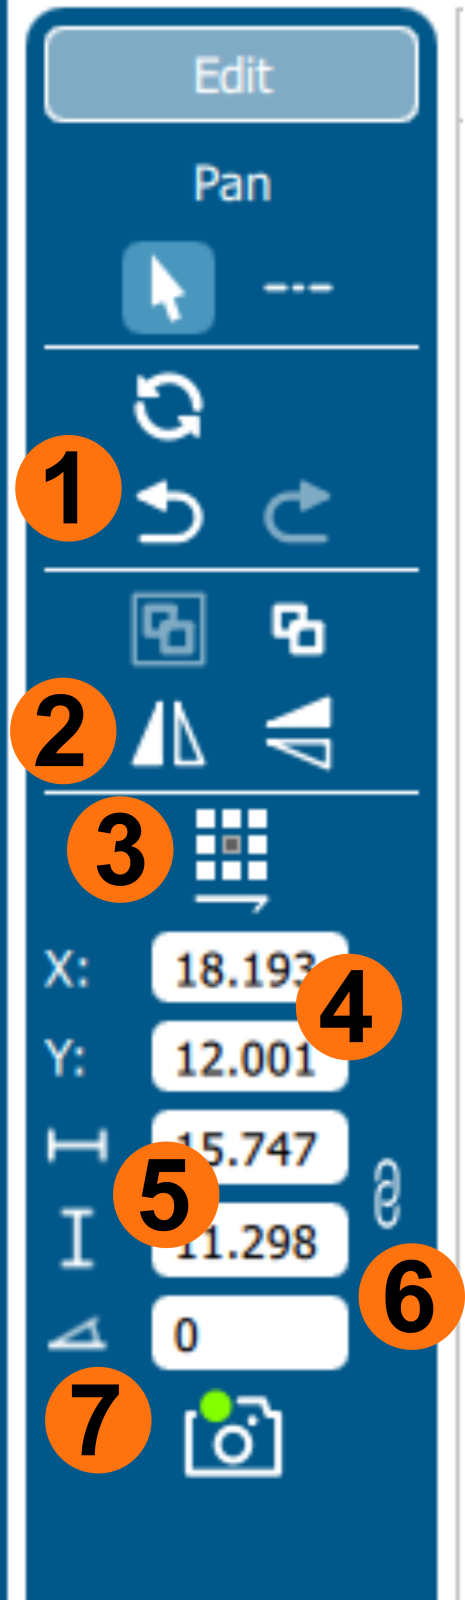
On the left side of the screen is where most file manipulation tools are. These options only appear when you select a design. Otherwise, you will see options to move the boundary, turn off the video, or increase the contrast. Let's go through them;
-
Undo & Redo Buttons: Allows you to correct a mistake if you accidentally change something.
-
Mirror: These 2 buttons allow you to flip your design horizontally or vertically.
-
Origin Point: Sets the origin point that the coordinates for the design are based on.
-
X & Y Coordinates: Allows you to move a design to an absolute position on the bed, relative to the Origin. Useful for setting up repeat cuts in the same spot.
-
Length and Width: The most important settings. Change these to scale your design.
- If you set a known-value box around your design, enter the length and width of it here to adjust the scaling properly.
-
Ratio Lock: The chain icon next to them shows they are linked and will proportionally scale. Click the chain to unlink them.
-
Angle: Used to rotate the design.
Right Menu: Job Setup#
The right side of the screen contains the settings related to how the laser will interpret your file.
Auto Focus#
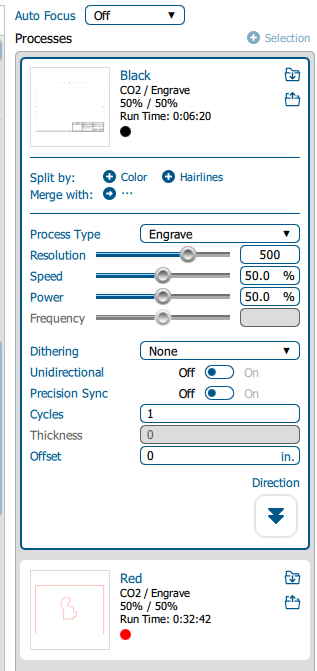
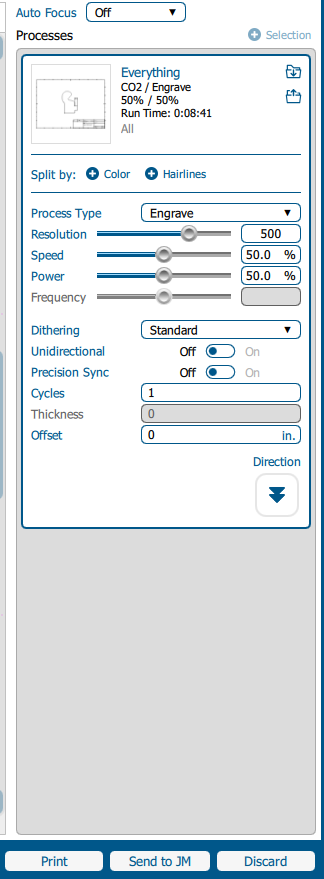
For the laser to cut properly, it has to focus on the material. To make this easier, the Epilog machines have an auto-focus tool. We'll go over how to use it more in the next section. When preparing the file, though, we can configure it to automatically focus for us. You can set the "Auto Focus" option to one of the following;
-
Off: The machine assumes it is already focused. Use this if you manually or automatically focused on the material already. This is the recommended setting for Fusion Edge machines.
-
Plunger: The machine will auto-focus on the material before it starts cutting. The machine guesses where it is OK to focus. This is the suggested setting for most users.
-
Thickness: The machine automatically focuses based on the thickness of the material set in the processes. Recommended for Fusion Pro machine. Make sure you set the thickness on all processes!
Laser Processes#
In the “Processes” section, we can see what the laser cutter is going to do, and with what settings. The order that items are listed in this menu are the order the laser will execute them. For instance, if we want the laser to engrave our design before cutting it out, we need to drag and arrange the engraving above the cutting.
By default, everything is grouped into a process called “Everything”. For jobs that have multiple settings (e.g. a cut and an engrave), we want to split this. Click the “Split by Color” button to split it into vectors and rasters, as well as by color. This will create a process named for each item based on either the color, or the type (image).
If you want to combine multiple processes (e.g. engrave vector text and an image at the same time), you can select “Merge with...” on one of the processes and choose the other one to merge it with.
Laser Process Settings#
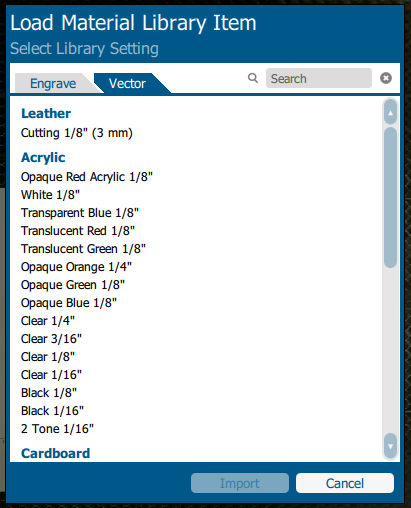
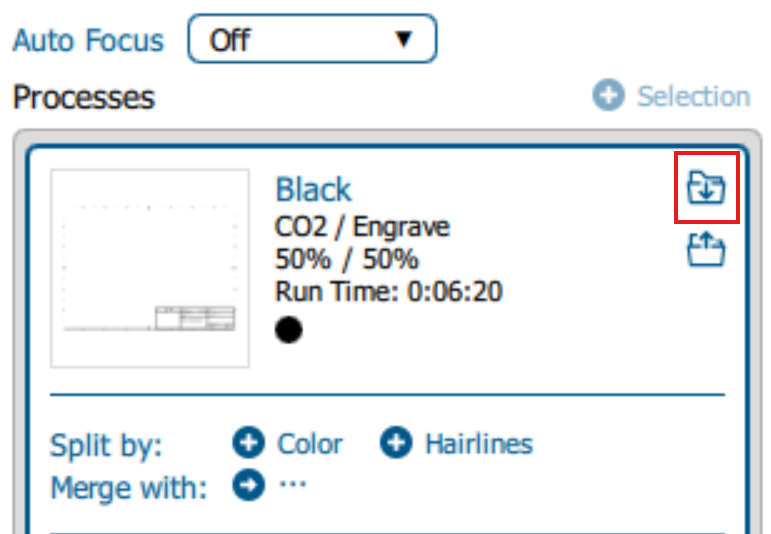
Once we have split, merged, and arranged the processes how we like, we can apply settings to them. Settings are already developed for many common materials, these can be imported by pressing the “Import Settings” icon in the top right corner.
The laser settings are split into 2 tabs; engrave (raster) and vector. Each of these tabs are then grouped by material. Select the settings you want, and click “Import” at the bottom to apply them. You will know it succeeded if the name of the process changes to the settings name (i.e. instead of being called "Red" it is called "Cutting 1/8").
Once you import settings, you can edit them. For instance, turning down the DPI will result in a faster engraving, or turning up the power & down the speed will make the engraving deeper. It is generally recommended to leave cut settings as-is.
Once you apply settings, you will also be able to see the time estimate for each section. Worst-case, run time for a 1 sq ft engraving should be under 45 minutes. If your engraving seems like it is taking a lot longer than that, something may be wrong.
If you do not find settings for your material, ask staff for help developing settings.
Once all the above steps are complete, you can hit the “Print” button at the bottom to send the file to the laser cutter.