Rotary Axis#
Laser cutters generally are designed to cut 2D material, like flat sheets of wood. The Epilog machines in the SHED Makerspace though can have an optional rotary axis installed, allowing the laser to cut or engrave the outside surface of a round part.
This is most commonly used for engraving water bottles, glasses, and similar, but can be used to process any laser-compatible material in a round shape.
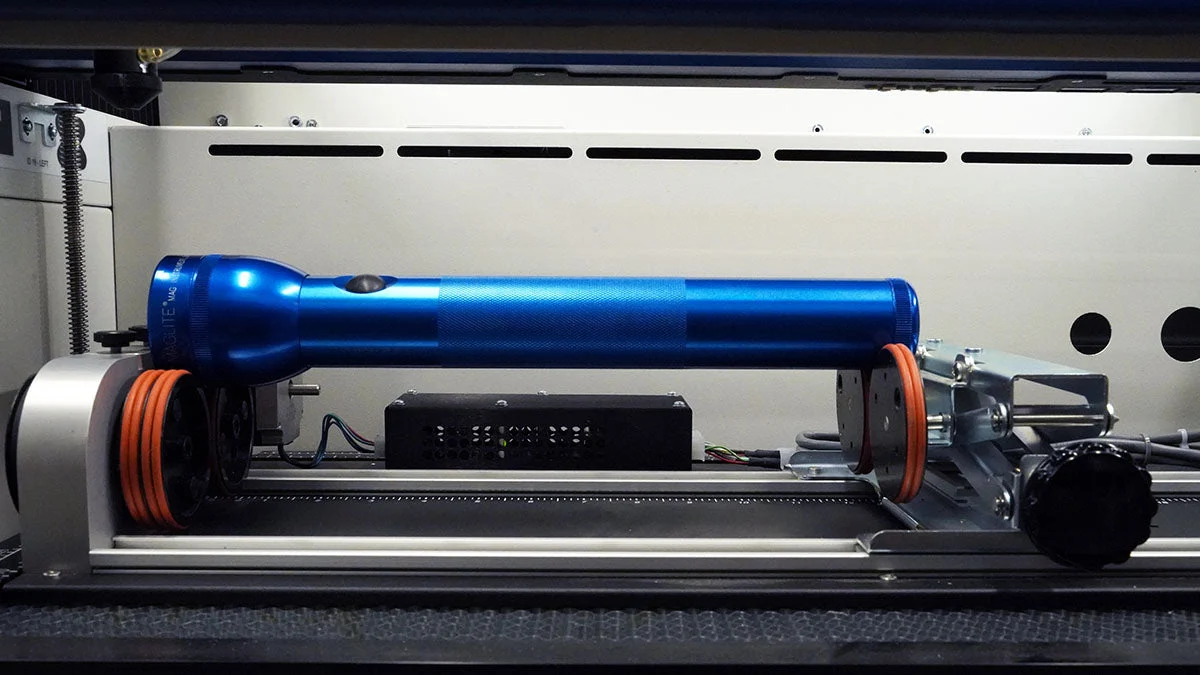
As an example, you can engrave the anodized aluminum of a flashlight to put your initials on it;
Video Overview#
If you would rather watch a video on how to use the Rotary axis, click the link below;
Laser Quick Tip: Using the Rim-Style Rotary Attachment
Installation#
- Move the bed of the laser cutter down at least 8 inches.
- Power down the laser cutter by flipping the main power switch on the right side rear of the machine!
- Place the rotary axis in the top left corner of the bed, pressing against both rulers.
- Plug the rotary control cable in to the laser cutter's port on the right side of the machine.
- While all 3 rotary axes are the same functionally, they have different length cables to reach the plug more easily.
- Power back on the laser cutter and wait for it to boot.
Loading Material#
Material is supported and moved by rubber wheels on the rotary axis; the left wheels are the drive wheels that actually move the material, and the right wheels are the idler wheels that help keep the material steady and level.
The drive wheels are the most important. Generally, you want the larger/heavier side of your material on this side of the rotary axis. For thinner and lighter materials, you can install a clamp that sits inside the material's rim, to keep it steady.
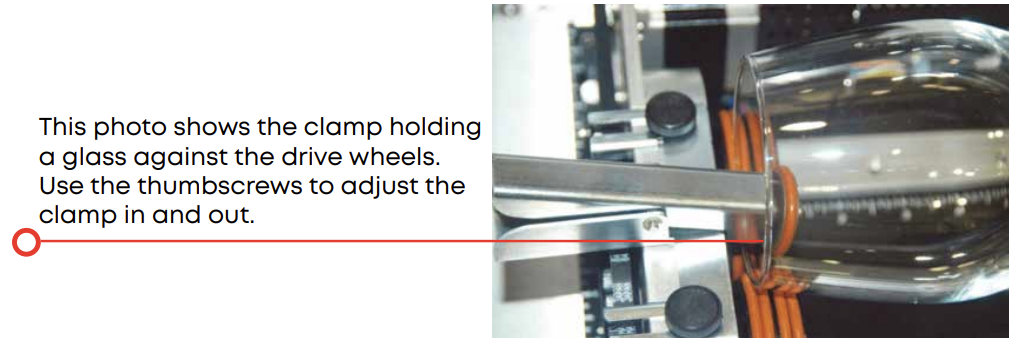
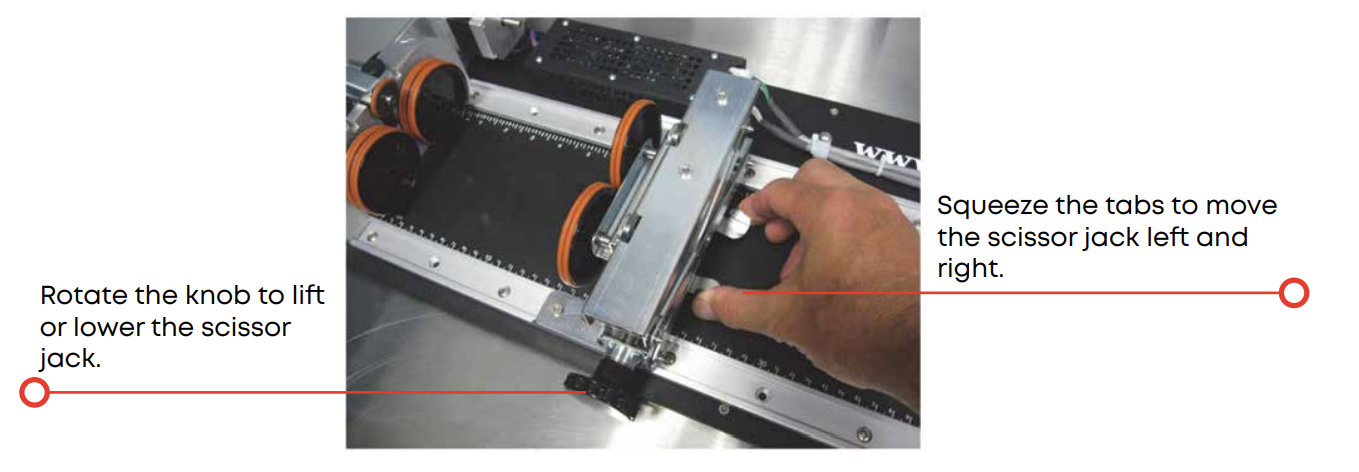
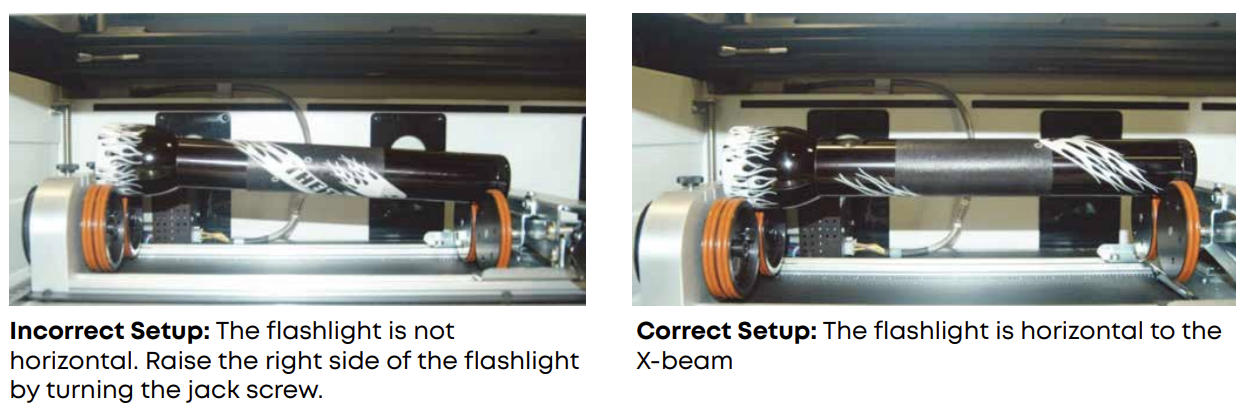
The idler wheels need to be moved in and up/down to secure the other end of the material. It is critical that the top surface of the material is level, set by adjusting the idler's jack screw.
Rotary Differences#
When in rotary mode, there are a few thing different about the laser's operation;
- The normal Y axis movement commands are replaced by rotation commands.
- The jog menu now has a "Park/Center Rotary Axis" button, used to move the head out of the way for easier loading of materials.
- Manual focusing with a focusing gauge is recommended over auto-focus.
- You should not use the camera for material alignment, instead use the Centering Point mode.
- Don't forget that the "top" of your material is now on the left side! Most designs will need to be rotated 90 degrees to work properly.
Engraving Tapered Parts#
The rotary axis is intended for use with straight-wall (i.e. cylindrical) objects. Objects with a taper, like a wine glass, will result in distortion of the design as different circumferences will be moving at different linear speeds.
For help in modifying a design to work on tapered parts, see the Epilog Manual section titled "Stretching or Shrinking Your Artwork for Objects with Multiple Circumferences" found around page 140-150 depending on your version.